Week 4
Written on September 1st , 2023 by Laura Weller
To make my own storage ox I started out with watching some Youtube tutorials on how to work in Fusion 360. Some links that were helpful are:
- https://www.youtube.com/watch?v=wdI86Q3ukFc&ab_channel=LarsChristensen
- https://www.youtube.com/watch?v=ZrcqauNvt0M&ab_channel=WhatMakeArt
- https://www.youtube.com/watch?v=9utpuieg5lI&ab_channel=WhatMakeArt (from minute 8.36)
- https://www.youtube.com/watch?v=_G-0i8BFEFs&ab_channel=WhatMakeArt
- https://www.youtube.com/watch?v=X_u4vFTTEVQ&ab_channel=ShopBotTools (from minute 18.30)
Modeling in Fusion
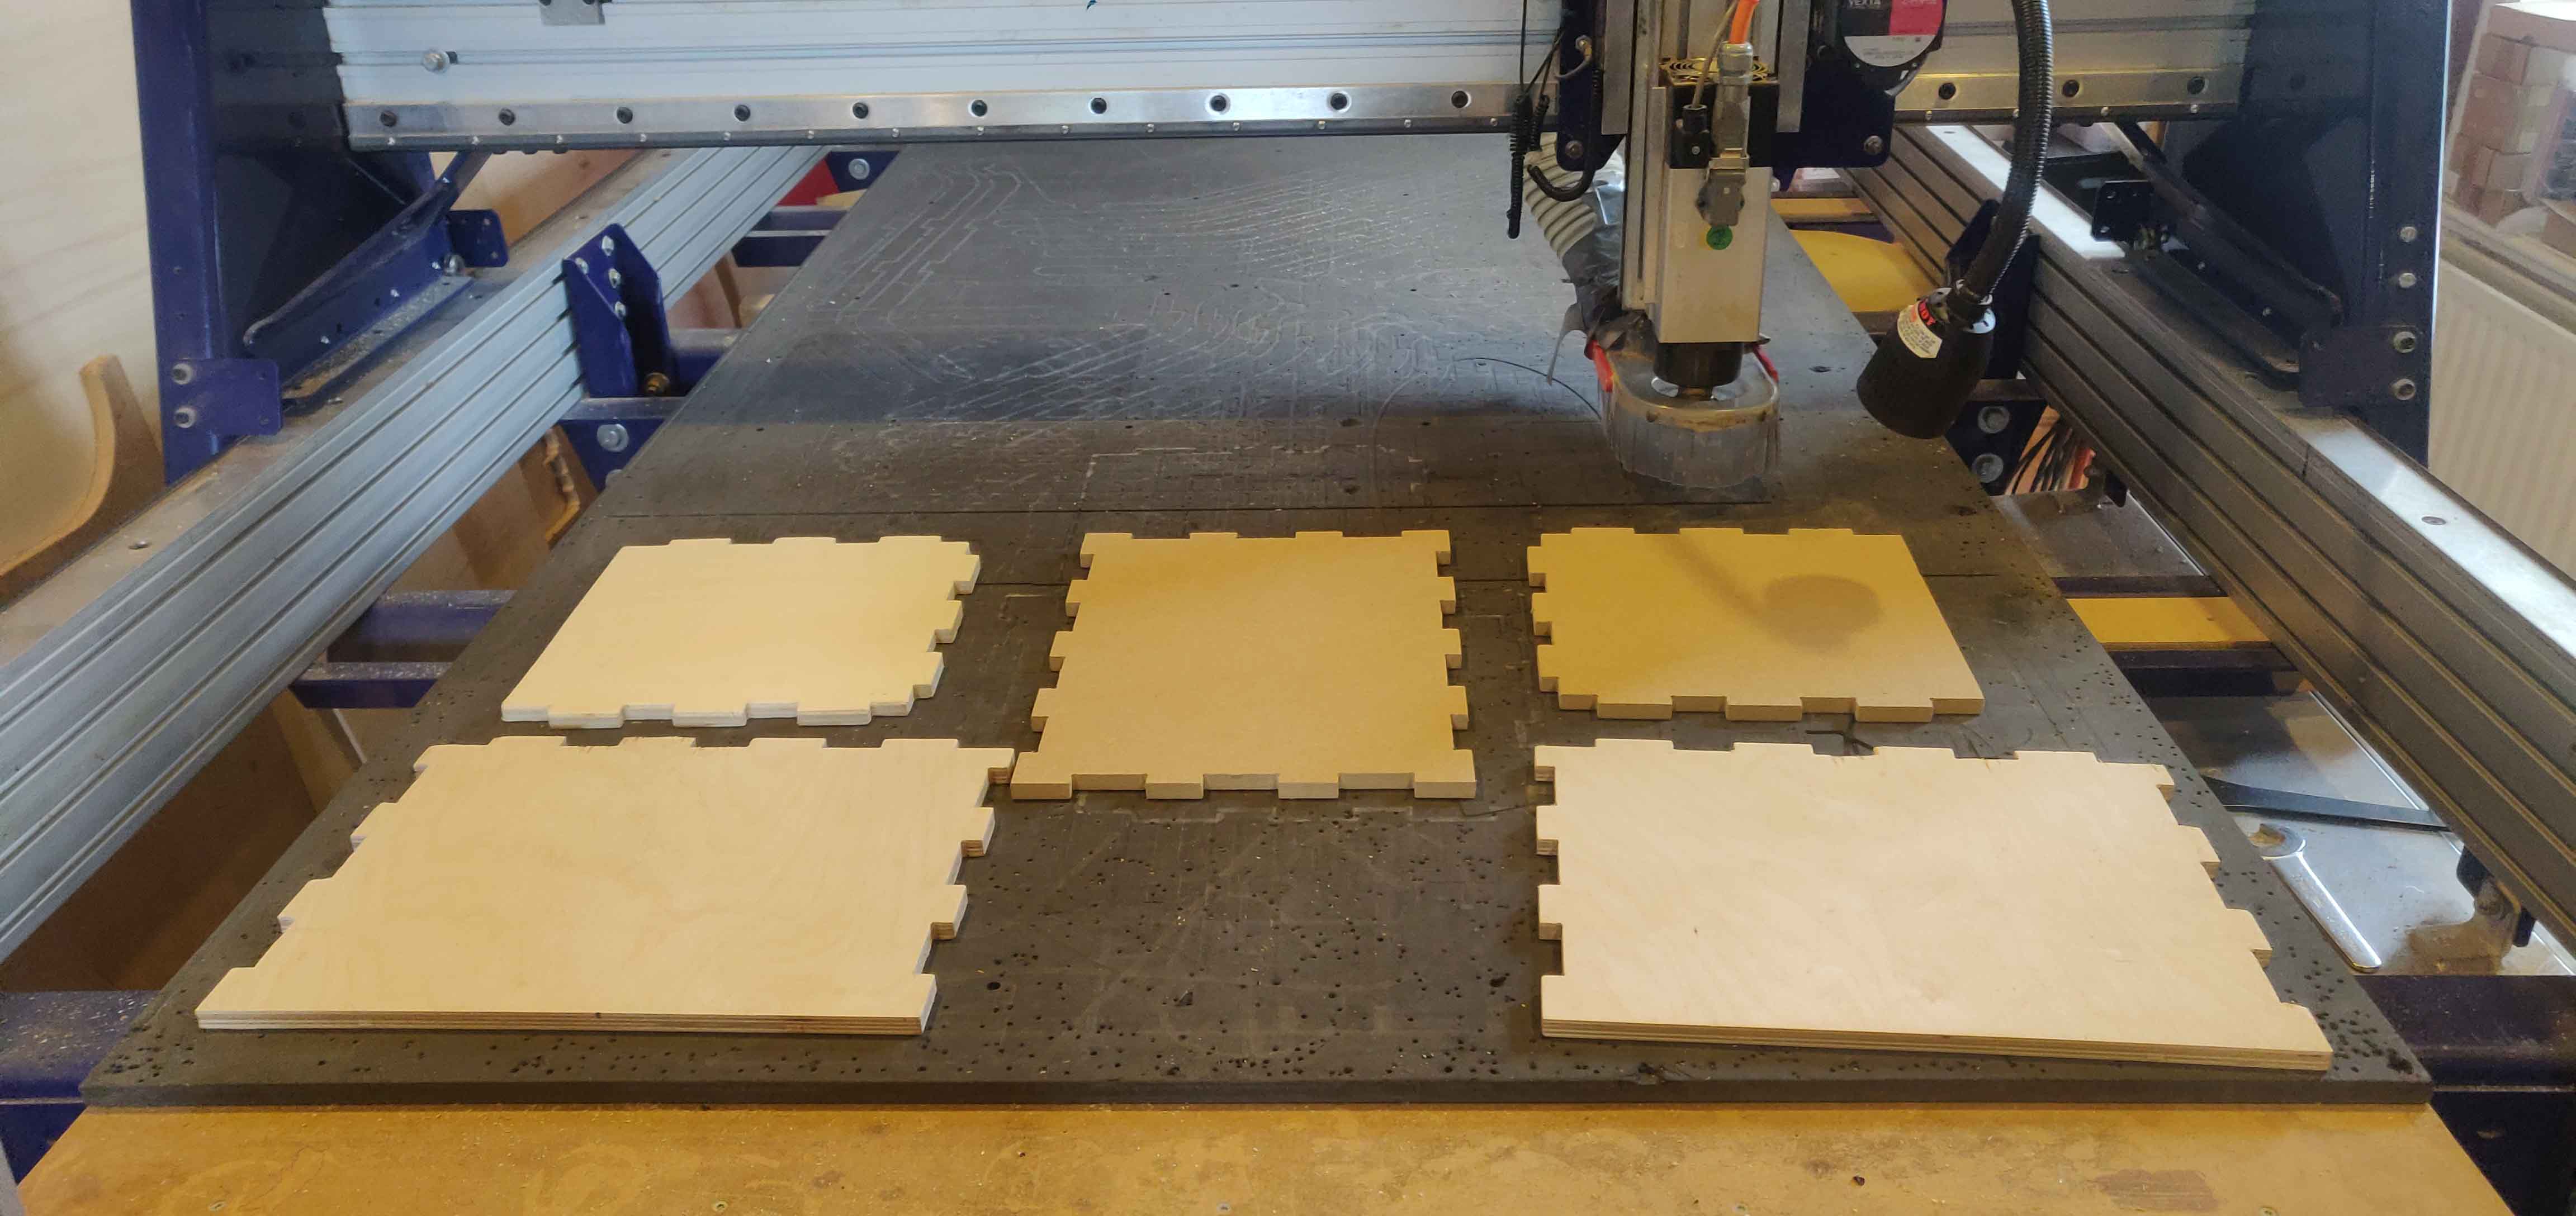
After watching some tutorials, I decided to design my own box. I started by measuring the wood that was available. I measured the thickness, length and width of the wood. See below my measurements for the box:
- 30 x 30 x 40
- This means 2x a wooden plate of 30 x 30; 3x a wooden plate of 30 x 45
- The wood that I could find had different sizes in thickness, so I had to calculate that into the design. This means:
- 30 x 30 (11.8 mm thick) 1x
- 30 x 30 (12,4 mm thick) 1x
- 30 x 40 (12,4 mm thick) 1x
- 30 x 40 (12,2 mm thick) 2x
After having set the thickness of the wood, hight, length and depth of the storage box, I decided to create parameters in Fusion 360. The parameters that I used were: height: 300mm, depth: 300mm, length 450mm, thicknessA 11,8mm, thicknessB 12,2mm, thicknessC 12,4mm. While following the tutorial steps (with some practise) I created the box in Fusion in around 2,5 hours.

After you have created the model in Fusion, you need to prepare it for the Shopbot. This you do by created a gcoded file for the shopbot. To do this in Fusion I again watched some lovely tutorials (all of them mentioned on the top of this page).
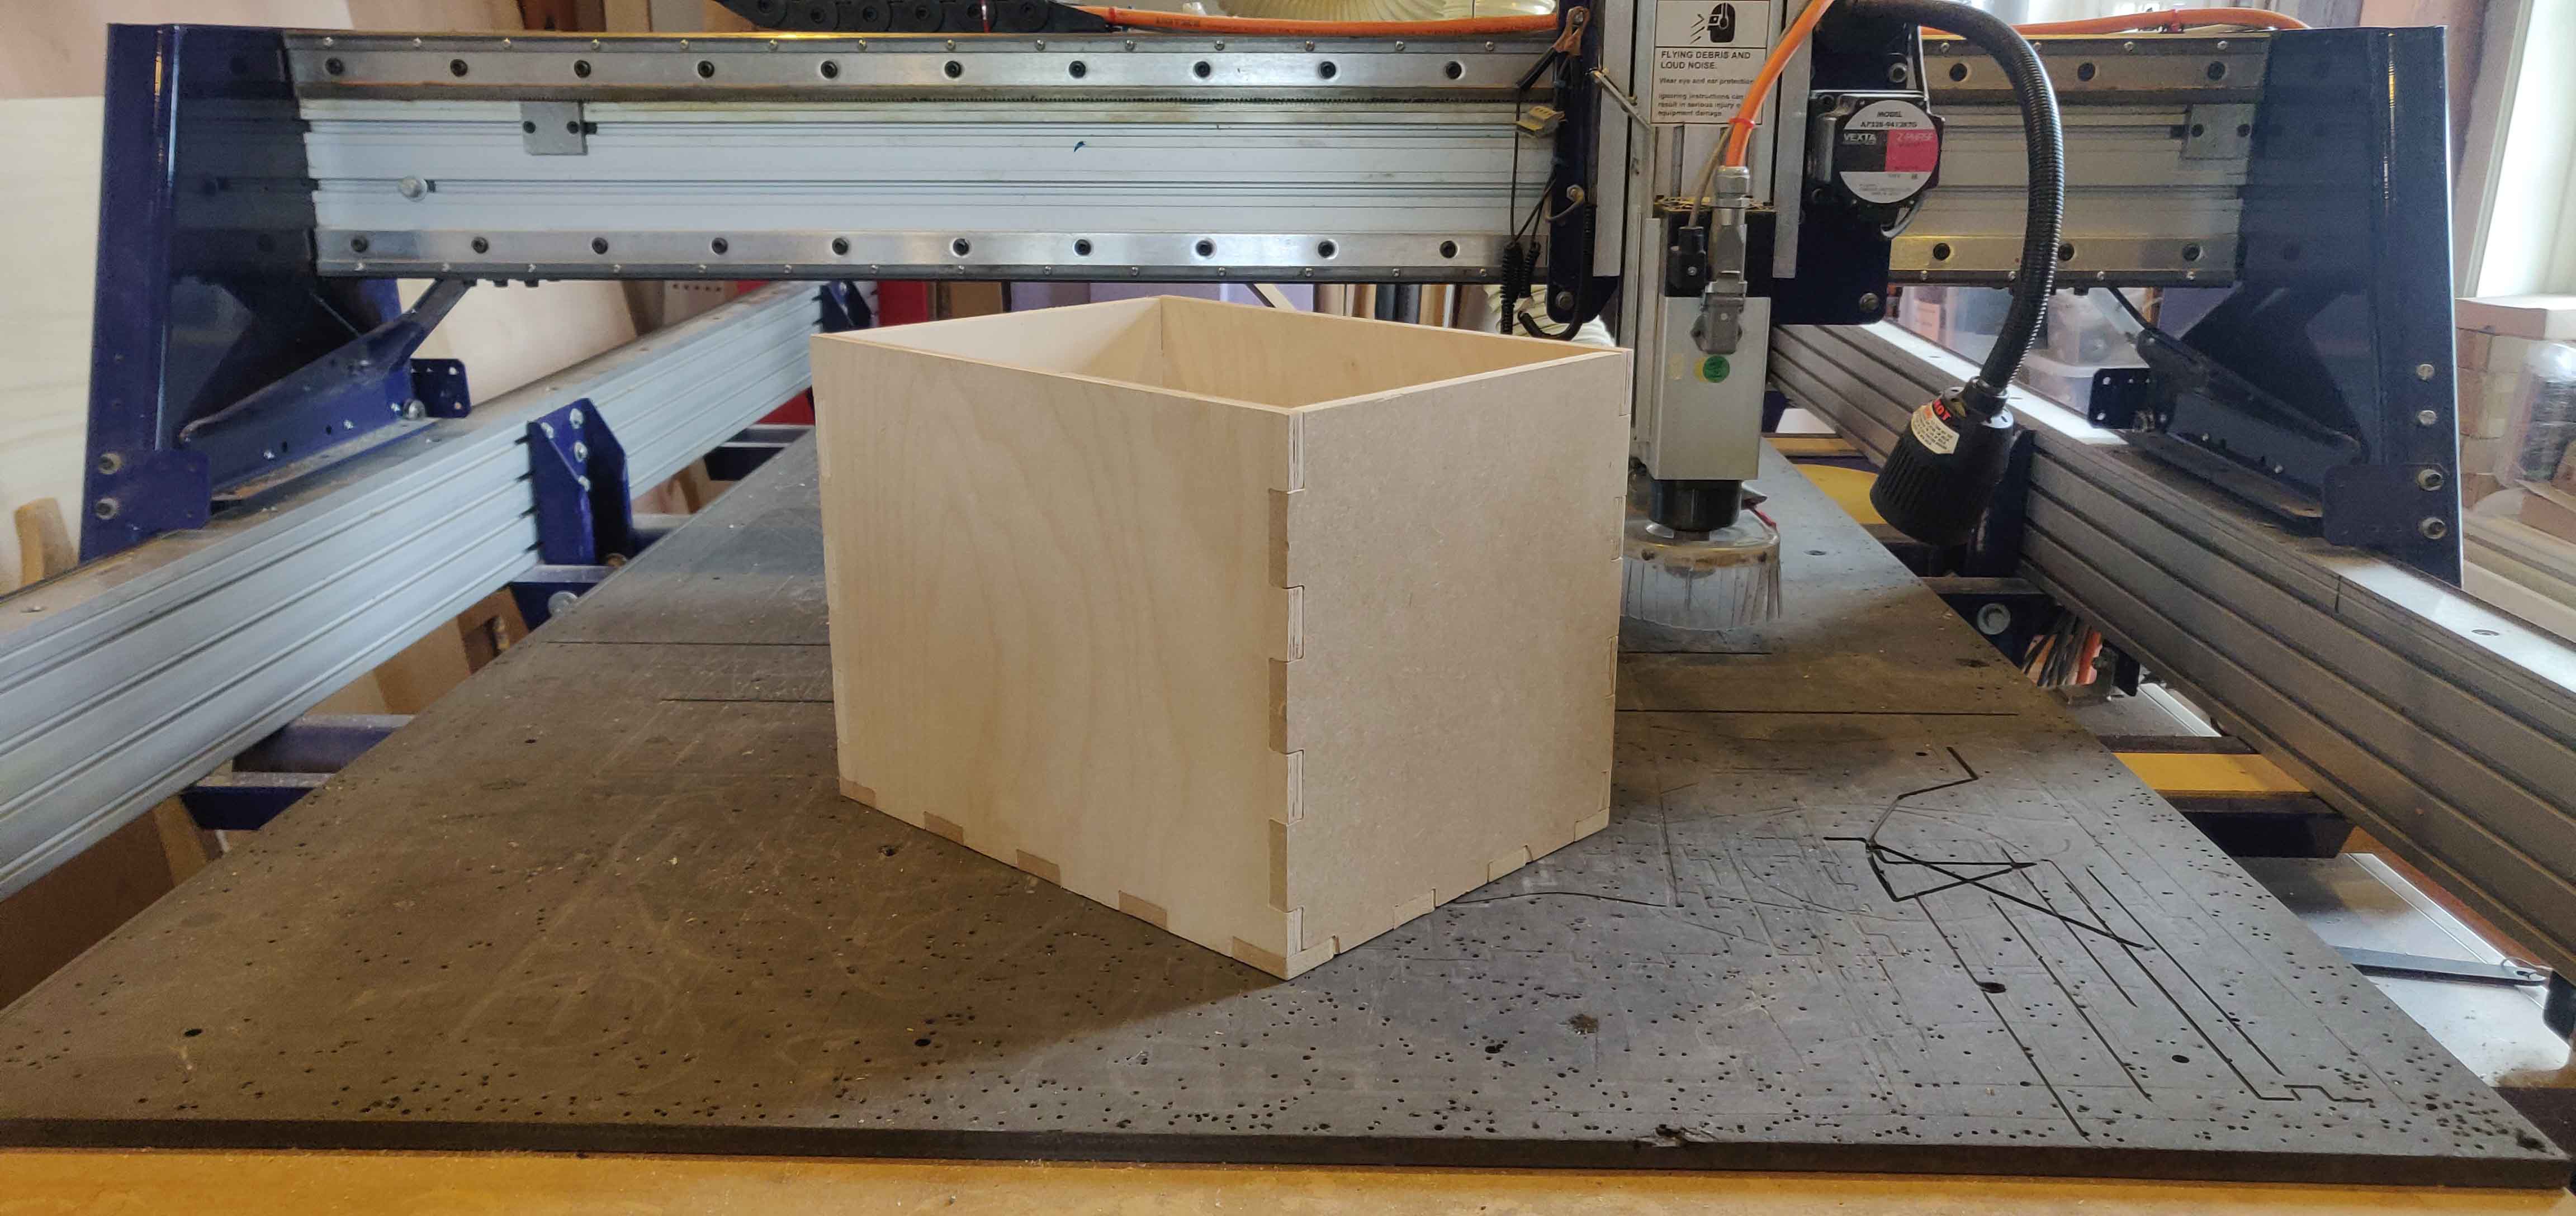
Cutting on the Shopbot
For cutting on the shopbot, please see the page about the ShopBot. In the end I ended up with a nice box. See images below: