3D modeling and printing
Written on August 22nd , 2023 by Laura Weller
3D modeling: Fusion 360

Above here you see the starting environment of the programm Fusion 360. Before starting with Fusion 360 I had some experience in 3D modeling. Programms I used before were CLO3D, the Adobe substance 3D programms and Blender. As I see it now, CLO3D is a 3D programm that can be used for creating garments, the Adobe substance 3D programms are great for changing or creating texture of objects. Blender is a programm that can be used for animation, video creation, games and image simulations needed for animation. Fusion is a great tool for mechanical drawings and designs. Learning to work with fusion I see as an additional skill that can help me in the end with my digital designs.
Below here I wrote down some basic shortcuts that helped me started. I also pasted the link of the youtube tutorials that helped me get started in Fusion 360.
shortcuts:
S = Sketch Toolbox
Q = Duwen (push) / trekken (pull)
C = Cirkel
D = Dimensie
L = Lijn
X = Constructie
P = Project
Ctrl + Z = Ongedaan maken
J = Scharnier (Joint)
After some puzzeling and playing around with the programm I managed to design a little cutlery cup where I can put my cutlery in after washing them (I have been waiting for the right time to get one - and I thought this would be a nice challenge). You can see below in the image the process of the 3D design in Fusion 360 and the 3D design in the programm UltiMaker Cura - which is a software that can help you 3D print your designed object.
After 3D modeling through Fusion 360 I decided to start with printing my 3D model on a 3D printer.
3D printing the model
To start with a 3D print, you have to upload your exported .stl file from Fusion 360 into UltiMaker Cura (another programm). In this programm you can choose the printer you are printing with, upload your .stl and slice it in layers so your design is prepared for the 3D printer to “read”. Now you can save your “sliced” file on a SD card to upload on the printer (it will now be saved as a .gcode file).
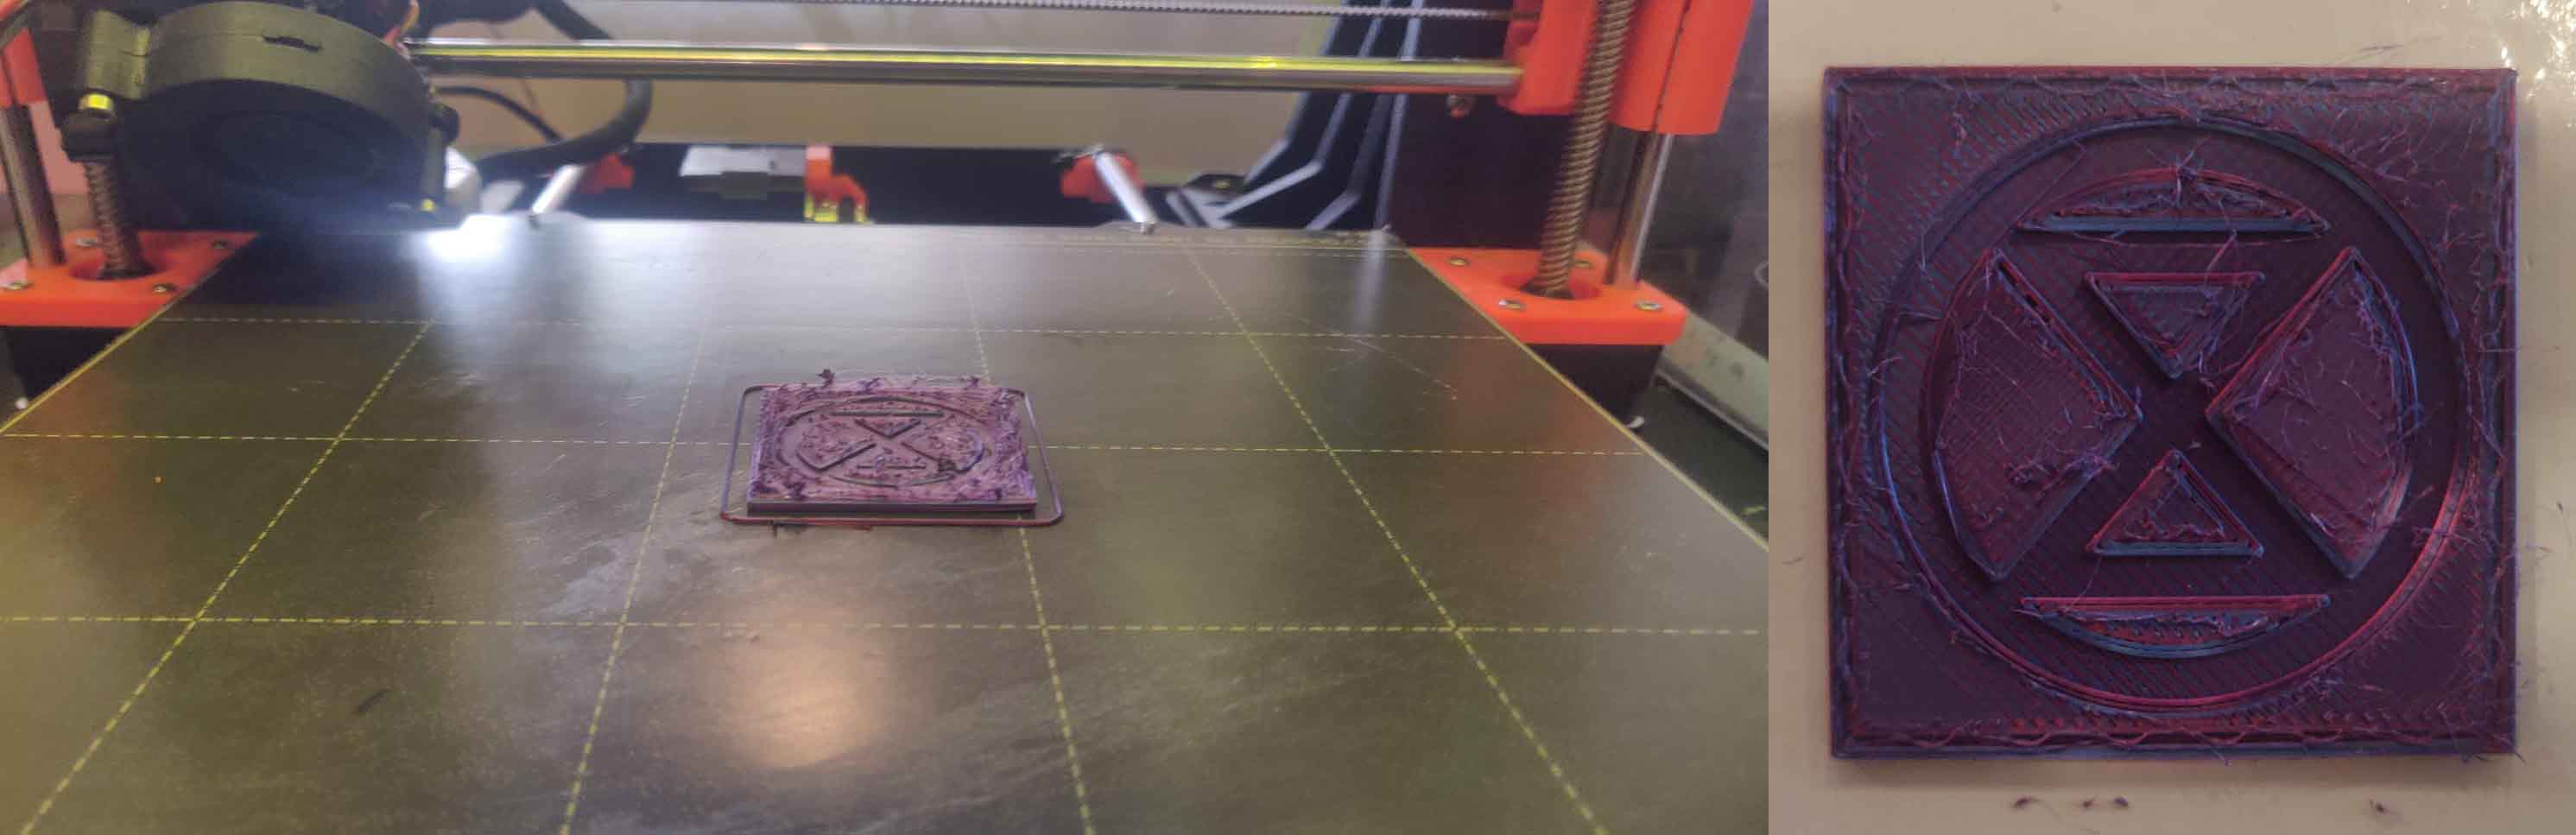
At De Waag there are several 3D printers to print with. See here the printers De Waag offers. To test my print and see the differences between all the printers, I have printed the same model on all of them. See the image below to see the model that I printed. Underneath the image you can see all the printers and their outcomes:
1. Prusa i3 MK3S
For the Prusa i3 MK3S your settings can be as follows: your material is PLA and your nozzle size is 1 mm.
- To start using this machine you move to the back of the machine and turn on the switch.
- Then you put the SD card with your .gcode file on it on the left side of the orange panel.
- Then you extract the old material by navigating on the panel to extract, the machine loads and asks you to extract the material. You pull then the material that is inserted just out.
- Then you extrude the new material by pushing the new material through the see through string until you can’t push further. Then you navigating on the panel to extrude, the machine loads and extrudes the material.
- Then you move to the orange panel and load your file and print it
Outcome of the design
2. reality Ender 3
For the Creality Ender 3, your settings can be as follows: your material is PLA and your nozzle size is 1 mm.
- To start using this machine you move to the back of the machine and turn on the switch.
- Then you put the mini SD card with your .gcode file on it on the bottom of the black box on the left side inside the printer.
- Then you move to the black panel. You navigate to prepare > preheat PLA. When the panel shows that the machine is you can extrude your material
- Then you extrude the new material by pushing the new material through the string until you can’t push further. Then you navigating on the panel to extrude, the machine loads and extrudes the material.
- Now you move over to Print from tf and you print your design.
- After printing your design you need to
- Then you retract the used material by navigating on the panel to prepare > preheat PLA. You wait till the machine has heated itself, then you choose prepare > change fillament. Now it retracts the material. When this is done, you turn off the machine.
When starting to print I started out with a bit of an easier print then the one you saw above. The print + result that I created you can see here below:
Outcome of the design